Table of Contents
- Introduction
- Why Wall Preparation Matters
- Tools and Materials Needed
- Cleaning and Repairing Walls
- Sanding and Smoothing Surfaces
- Priming for the Best Finish
- Common Mistakes to Avoid
- DIY vs Professional Wall Preparation
- Conclusion
Introduction
A flawless paint job begins long before the brush touches the wall. Proper wall preparation ensures that paint adheres well, lasts longer, and looks professional. Whether you’re refreshing your living room or painting a new apartment in Singapore, preparing walls correctly saves time, money, and frustration.
Hiring a professional painting service can simplify this process, especially for larger projects or complex wall conditions.
Why Wall Preparation Matters
Neglecting wall preparation can result in:
- Peeling and Flaking: Paint that doesn’t adhere to unclean or uneven surfaces will peel prematurely.
- Uneven Finish: Cracks, holes, and bumps are visible once painted.
- Wasted Materials: Poor prep can mean applying multiple coats to achieve coverage, increasing cost.
Proper preparation ensures a smooth, durable, and visually appealing finish.
Tools and Materials Needed
Before starting, gather the right tools:
- Mild detergent and sponge for cleaning
- Spackle or filler for cracks and holes
- Sandpaper (medium and fine grit)
- Primer for improved adhesion
- Putty knife, brushes, and scrapers
- Drop cloths and painter’s tape
Having everything ready prevents interruptions and maintains workflow efficiency.
Cleaning and Repairing Walls
Step 1: Cleaning
- Remove dust, dirt, and grease stains using a mild detergent solution.
- Rinse and allow walls to dry completely.
Step 2: Filling Cracks and Holes
- Use spackle or filler to patch cracks, dents, and nail holes.
- Apply evenly and smooth with a putty knife.
- Let dry completely before sanding.
Proper cleaning and repair provide a uniform surface for paint to adhere and prevent imperfections from showing through the final coat.
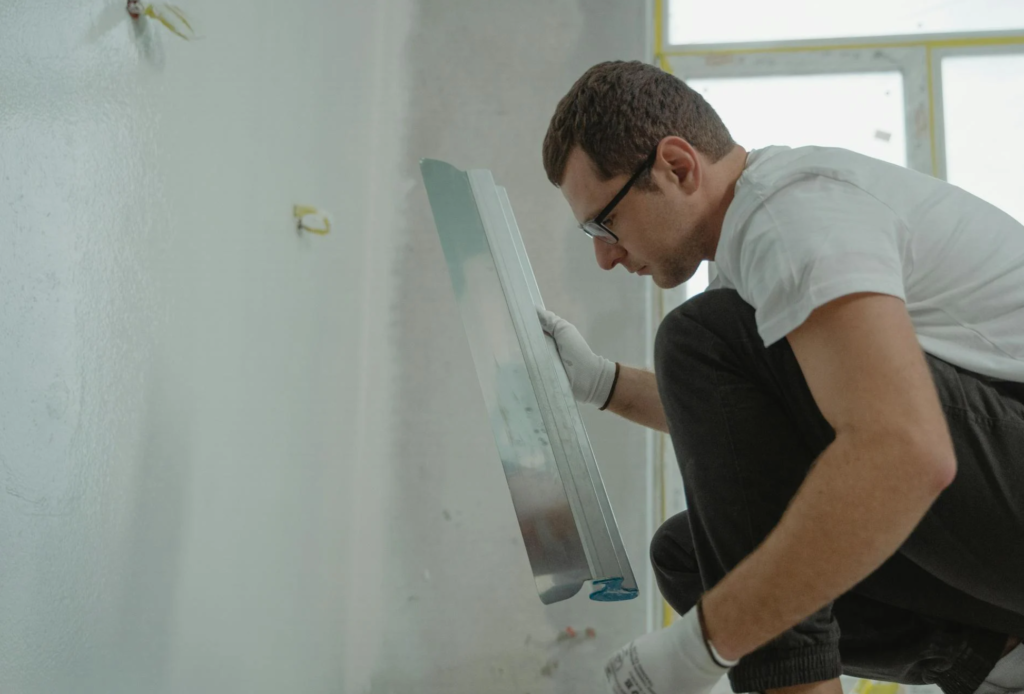
Sanding and Smoothing Surfaces
Sanding ensures smooth surfaces and better paint adhesion:
- Start with medium-grit sandpaper to remove rough patches or old paint flakes.
- Follow with fine-grit sandpaper to achieve a smooth, even finish.
- Wipe walls with a damp cloth to remove dust before priming.
Skipping sanding may result in uneven textures and reduced paint durability.
Priming for the Best Finish
Primer acts as a base layer, improving paint adhesion and final color:
- Benefits of Priming: Seals porous surfaces, reduces the number of paint coats, and ensures consistent color.
- Application Tips: Use a roller for large areas and brushes for corners or edges.
- Special Considerations: Some walls, like patched areas or raw plaster, may require extra coats of primer.
A properly primed wall ensures that your investment in high-quality paint pays off with a long-lasting finish.
Common Mistakes to Avoid
- Skipping Cleaning: Dirt or grease prevents paint from adhering.
- Overfilling Cracks: Excess filler can create lumps after sanding.
- Ignoring Drying Time: Paint or primer applied on damp surfaces leads to peeling.
- Using Wrong Sandpaper: Too coarse can damage walls; too fine may not smooth rough areas.
Avoiding these errors ensures professional-looking results every time.
DIY vs Professional Wall Preparation
DIY Advantages:
- Cost-effective for small projects
- Full control over timing and schedule
Professional Advantages:
- Expertise in surface assessment and prep
- Access to specialized tools and high-quality primers
- Efficient execution for larger homes or tricky surfaces
For complex projects, investing in a trusted painting service ensures time-saving and flawless results.
Conclusion
Wall preparation is a critical step in any painting project. By thoroughly cleaning, repairing, sanding, and priming walls, you ensure that paint adheres properly, lasts longer, and looks stunning. Whether tackling a DIY project or hiring professionals, taking preparation seriously is the key to a beautiful, long-lasting finish in your Singapore home.